Setup Active Directory Lab
Tags: active-directoryTable of Contents
Install Vagrant
Configure machines using Vagrant
- Machine-A - Active Directory Domain Controller
- Machine-B - Windows 10 desktop joined to domain
Spin up machines
Validation
- Machine-A
- Machine-B
Reference
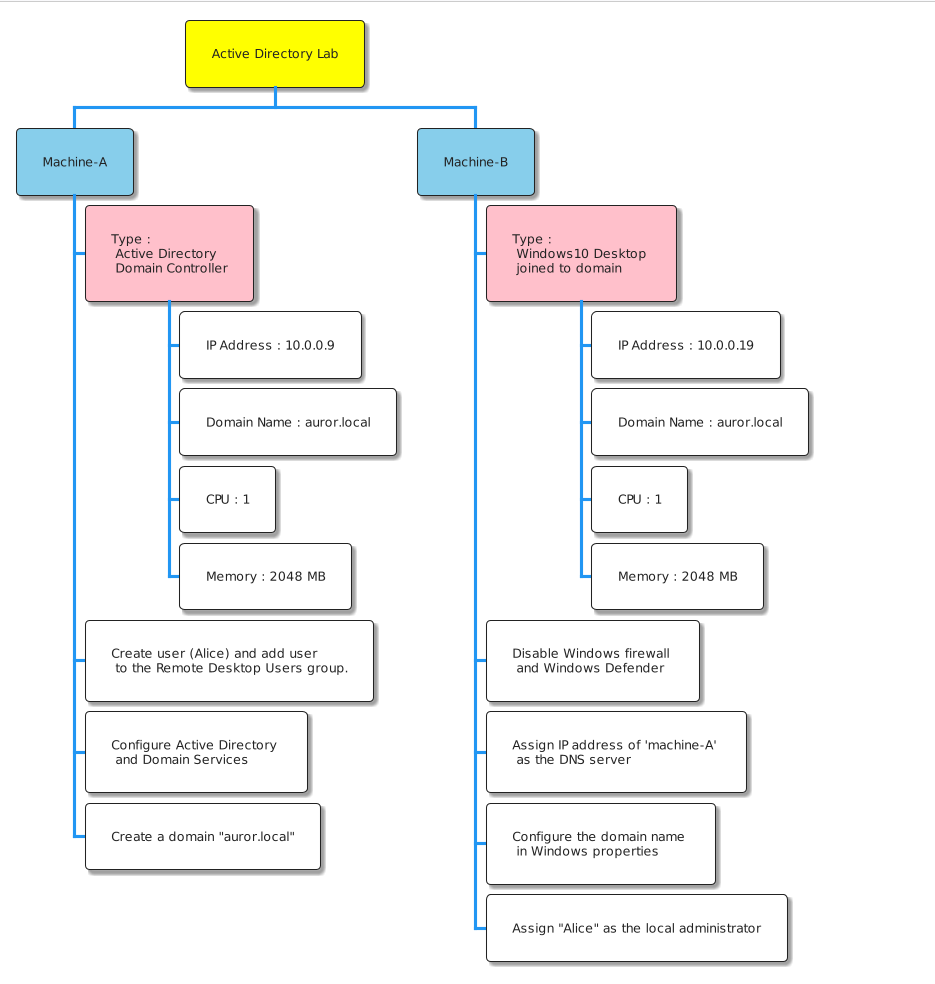
This post will share the details on configuring an Active Directory lab for threat hunting. We will use a popular tool called “Vagrant” to provision the machines through automation. This post is part-1 of the Auror Project which is hosted by Sudarshan Pisupati
We will try to provision two virtual machines - Machine A and Machine B using Virtual Box and Vagrant.

NOTE: Please ensure
The host machine has atleast 16GB of RAM and 40GB of hard disk space available.
Virtualbox is installed on the host OS.
Install Vagrant
I am installing Vagrant on my host OS - Ubuntu.If you are using a different host OS follow the instructions to install Vagrant from it’s documentation.
- Issue the below commands to install vagrant
curl -fsSL https://apt.releases.hashicorp.com/gpg | sudo apt-key add -
sudo apt-add-repository "deb [arch=amd64] https://apt.releases.hashicorp.com $(lsb_release -cs) main"
sudo apt-get update && sudo apt-get install vagrant
- When Vagrant is installed successfully, check the version using the command
vagrant --version
$>vagrant --version
Vagrant 2.2.19
$>
- Install the
vagrant-reload plugin required to restart the machines during configuration using the command vagrant plugin install vagrant-reload.
$> vagrant plugin install vagrant-reload
Installing the 'vagrant-reload' plugin. This can take a few minutes...
Installed the plugin 'vagrant-reload (0.0.1)'!
Machine A - Active Directory Domain Controller
- As per the specifications ‘Machine A’ should be an Active Directory Domain Controller (DC). We will use the Vagrant Cloud to spin up the Windows 2019 server which will act as AD Domain Controller.
- We will use the Vagrant box published by gusztavvargadr which is available here.
- Vagrant file for Machine A is provided below
Vagrant.configure("2") do |config|
	config.vagrant.plugins = ["vagrant-reload"]
	config.vm.define "Machine-A" do |dc|
		dc.vm.provider "virtualbox" do |vbox|
			vbox.memory = 2048
			vbox.cpus = 1
			vbox.name = "Auror - Machine A"
			vbox.gui = true
		end
    dc.vm.box = "gusztavvargadr/windows-server"
    dc.vm.box_version = "1809.0.2205"
		dc.winrm.transport = :plaintext
		dc.winrm.basic_auth_only = true
		dc.vm.hostname = "aurordc"
		dc.vm.network "private_network", ip: "10.0.0.9"
		dc.vm.provision "shell", path: "./scripts/setup_dc.ps1"
		dc.vm.provision "reload"
		dc.vm.boot_timeout = 6000
	end
end
NOTE : Vagrant uses winrm protocol to communicate with the Windows Server VM. To authenticate itself to the VM it creates a system account with credentials
username: vagrant , password : vagrant
When the machine A is provisioned successfully, we will have to configure
- Create user (Alice) and add her to the Remote Desktop Users group.
- Active Directory and Domain Services
- Create a domain “auror.local”
To achieve this we will use a powershell script and it is available in the scripts directory.
Script - setup_dc.ps1
# Creating a Local User
net user alice Pass@123 /add

# Allow User to perform RDP
net localgroup "Remote Desktop Users" alice /add

# Global Variables
$domain_name = "auror.local"
$domain_netbios_name = "auror"
$mode = "Win2012R2"
$password = "Password@123!"
$secure_password = $password | ConvertTo-SecureString -AsPlainText -Force

# Install Active Directory
Install-WindowsFeature AD-Domain-Services -IncludeManagementTools -IncludeAllSubFeature

# Configuring Active Directory
## Import AD DS Deployment
Import-Module ADDSDeployment

## AD DS Forest Configuration
$forest_config = @{
	DomainName = $domain_name
	SafeModeAdministratorPassword = $secure_password
	DomainMode = $mode
	DomainNetBIOSName = $domain_netbios_name
	ForestMode = $mode
	InstallDNS = $true
	DatabasePath = "C:\Windows\NTDS"
	LogPath = "C:\Windows\NTDS"
	SYSVOLPath = "C:\Windows\SYSVOL"
	Force = $true
	NoRebootOnCompletion = $true
}

## Install AD DS Forest
Install-ADDSForest @forest_config
Machine B - Windows 10 desktop joined to domain
- As per the specifications, ‘Machine B’ is a Windows 10 desktop joined to “auror.local” domain.
- We will use the Vagrant box published by gusztavvargadr which is available here
Vagrant.configure("2") do |config|
	config.vagrant.plugins = ["vagrant-reload"]
	config.vm.define "Machine-B" do |user1|
		user1.vm.provider "virtualbox" do |vbox|
			vbox.memory = 2048
			vbox.cpus = 1
			vbox.name = "Auror - Machine B"
			vbox.gui = true
		end
		user1.vm.box = "gusztavvargadr/windows-10"
		user1.vm.box_version = "2102.0.2204"
		user1.winrm.transport = :plaintext
		user1.winrm.basic_auth_only = true
		user1.vm.hostname = "UserMachine"
		user1.vm.network "private_network", ip: "10.0.0.19"
		user1.vm.provision "shell", path: "./scripts/join_desktop.ps1"
		user1.vm.provision "reload"
		user1.vm.boot_timeout = 6000
	end
end
# Disable Firewall
Set-NetFirewallProfile -Profile Domain,Public,Private -Enabled False

# Disable Windows Defender
Set-MpPreference -DisableBehaviorMonitoring $true -DisableRealtimeMonitoring $true -DisableScriptScanning $true -DisableIOAVProtection $true -EnableNetworkProtection 0

# Configure Machine A as the DNS Server
$net_adapters = Get-WmiObject Win32_NetworkAdapterConfiguration
$net_adapters | ForEach-Object {$_.SetDNSServerSearchOrder("10.0.0.9")}

# Add Computer to Domainn
$username = "vagrant"
$password = "vagrant"
$secure_password = $password | ConvertTo-SecureString -AsPlainText -Force
$credentials = New-Object System.Management.Automation.PSCredential($username, $secure_password)
$domain = "auror.local"

Add-Computer -DomainName $domain -Credential $credentials

# Add User Adam to Local Administrators
net localgroup "Administrators" auror\alice /add
Spin up machines
- Now we can consolidate the Vagrant files for ‘Machine A’ and ‘Machine B’ into a single file.
- We will place the powershell scripts inside the scripts directory. The scripts directory should be in the same directory as the vagrant file.
- Directory structure shown below
.
├── Vagrantfile
└── scripts
    ├── setup_dc.ps1
    └── join_desktop.ps1

1 directory, 3 files
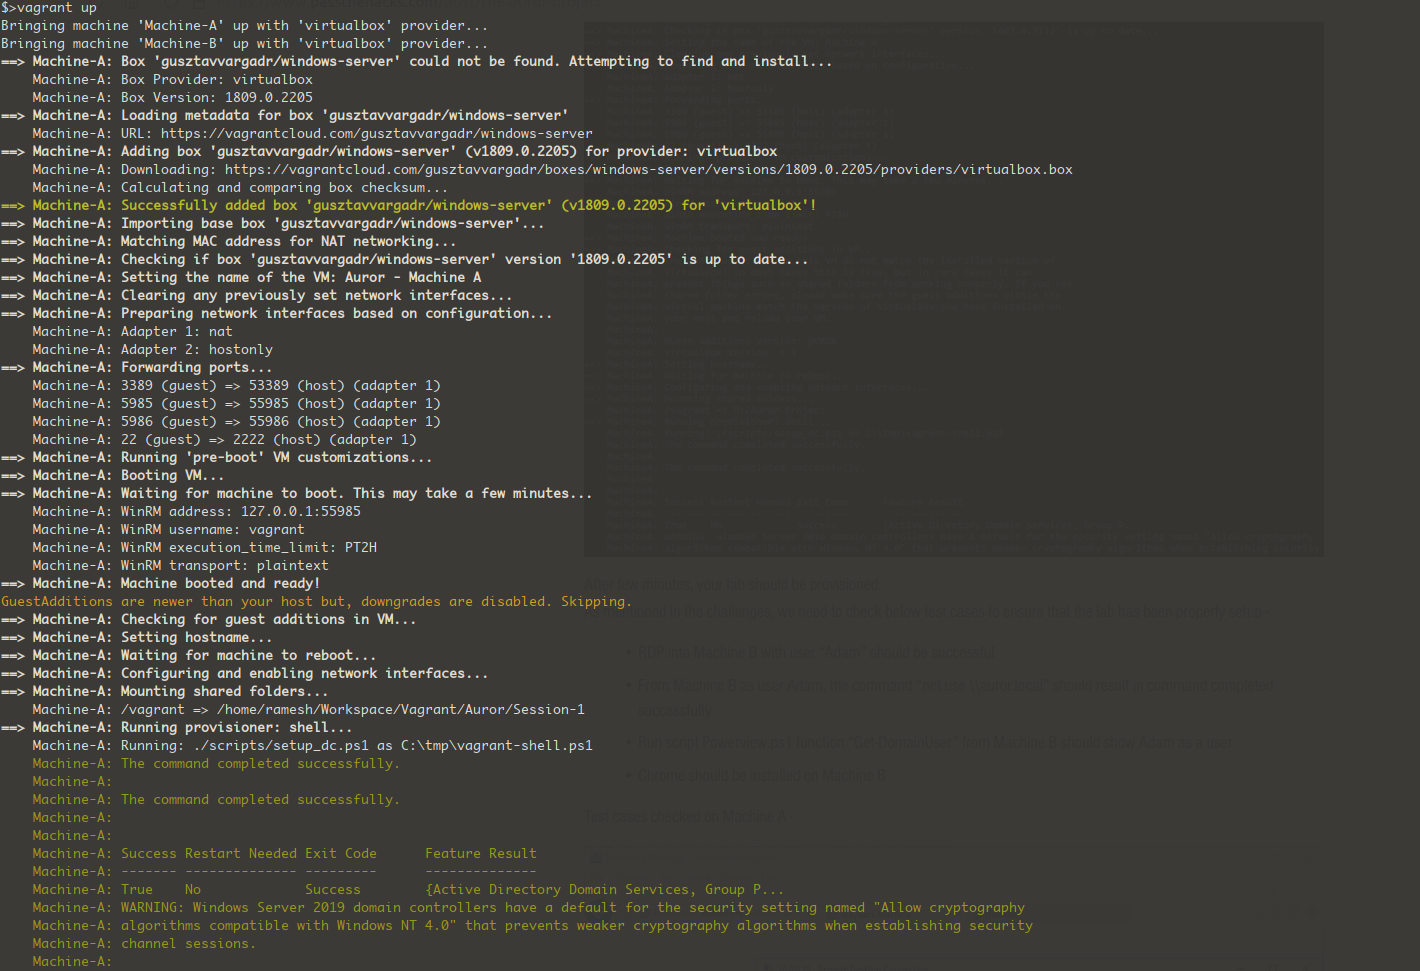
- We can spin up the Active Directory lab now by issuing the command
vagrant up from the directory where ‘Vagrantfile’ is available - Output of the lab being provisioned.

Validation
- When the vagarnt scripts completes successfully,it is time for validation
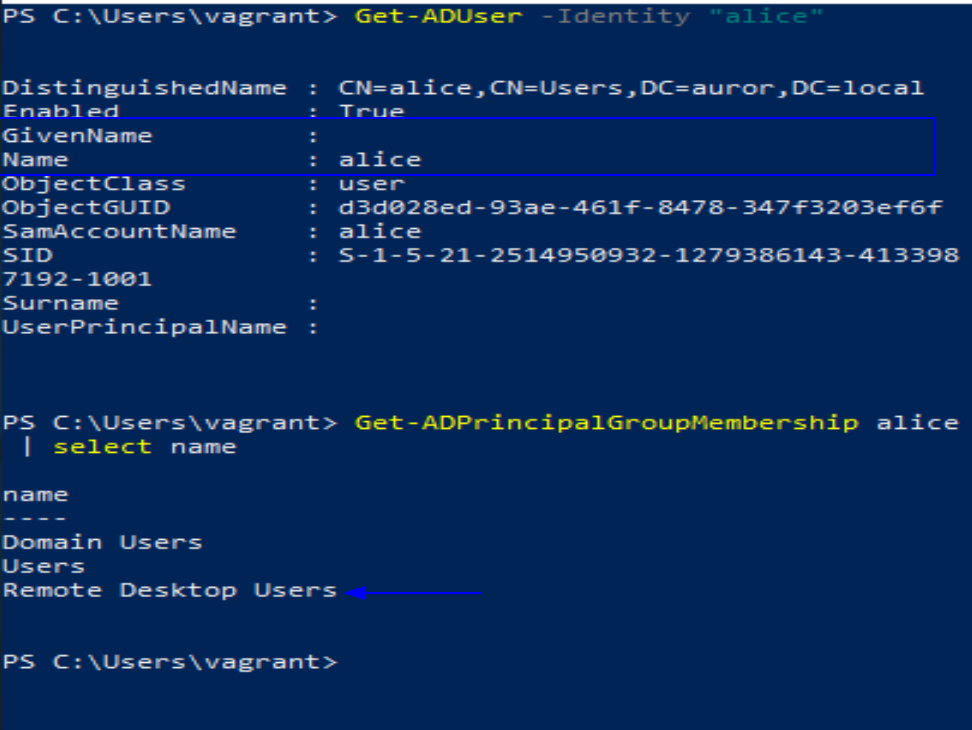
Machine-A
- User “alice” has been created on AD Domain
dc=auror,dc=local and added to ‘Remote Desktop Users’ group

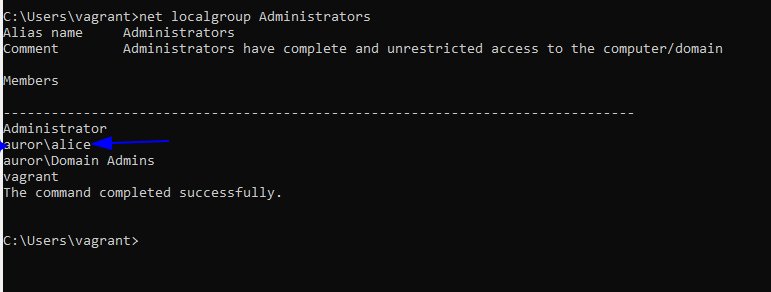
Machine B
- User “alice” is added as administrator on Machine-B

- ‘Machine-A’ is added as a DNS server on machine-B

Reference